Tools required.
Stanley knife or similar and kitchen roll.
Step 1.
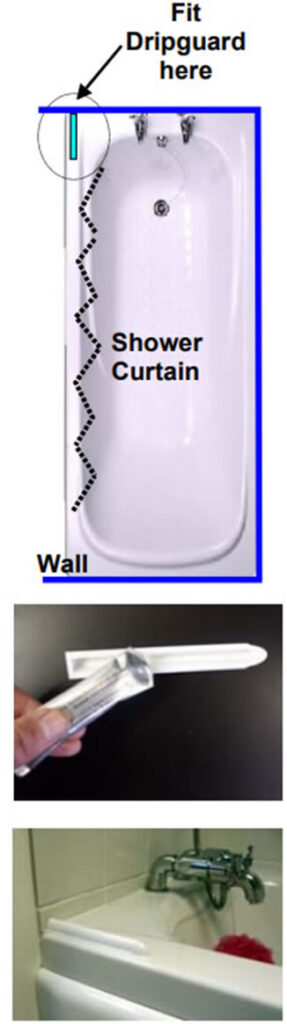
- Dripguard fits to the bath at the same end as the taps and on the
same side as the shower curtain (see above picture). - Check that Dripguard will fit flush with the bath and tiled wall. You
may have to remove a little sealant with a knife to allow Dripguard to
fit correctly.
Step 2.
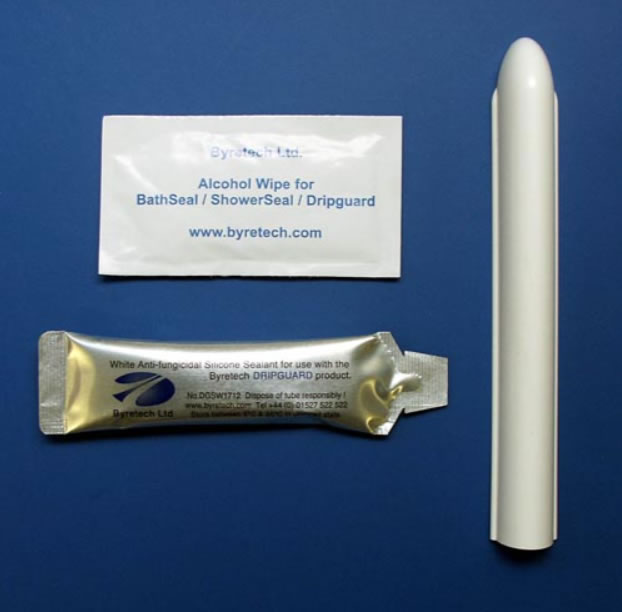
- Take the cleaning wipe from it’s packet and use it to clean the area
where Dripguard will be fitted. Also wipe the base and end of the
Dripguard too. Allow the area to dry for a few minutes after cleaning. - Note. Take care using the alcohol cleaning wipe and do not smoke or
have naked flames present when using or disposing of the wipe.
Step 3.
- Ensure silicone sealant is at room temperature and apply a uniform
thin continuous line of sealant to the bottom rim and flat end of the
Dripguard. - Take care not to get any sealant in your eyes or mouth
Step 4
- Gently place the Dripguard in its desired location on your bath.
- Ensure it is flush with the bath and the tiled wall.
- Apply a light pressure and push firmly into place.
Step 5.
- Immediately after Step 4, hold the Dripguard in place whilst removing
the excess sealant around the Dripguard with a clean dry finger. - Clean your finger with the kitchen roll and finish off by running a wet
finger around the Dripguard to smoothe the sealant and finish the
job. - Clean your hands again and dispose of the sealant carefully.
- Leave for 2 hours and Dripguard is ready for use.