SAFETY- BEFORE YOU START:
- Handle glass with great care. Although the glass is very tough, sharp impacts can
damage the bathscreen. - Make sure there are no hidden pipes or cables hidden in the wall where you
intend to drill. - Wear safety goggles, shoes and appropriate clothing.
- If you have long hair, tie it back out of the way
BEFORE INSTALLATION
- Two people are needed to carry out parts of the procedure, lift with care.
- Check the bath is perfectly level and does not sag or bow when you stand or
sit in it. - The bathscreen must only be be fitted on water proof walls i.e. tiled walls which
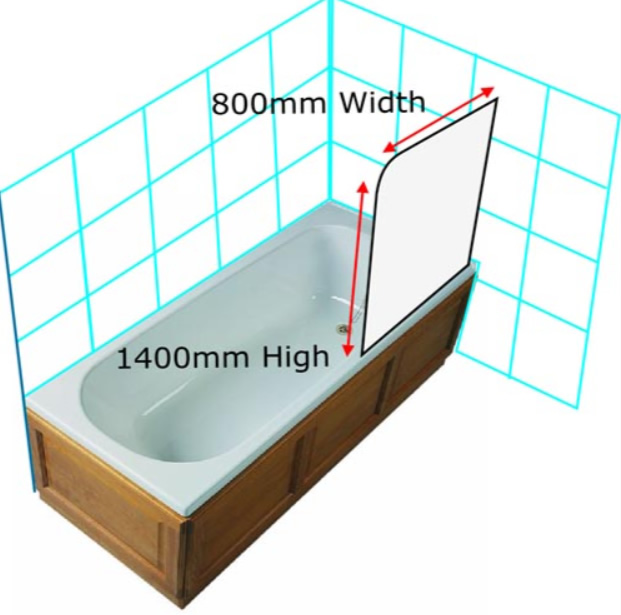
are sealed with waterproof grout. - Check that the bath has a flat top edge with no protruding handles, which could
interfere with the movement of the bathscreen. - Always check very carefully that components are vertical.
- Please correctly dispose of packaging properly after installation.
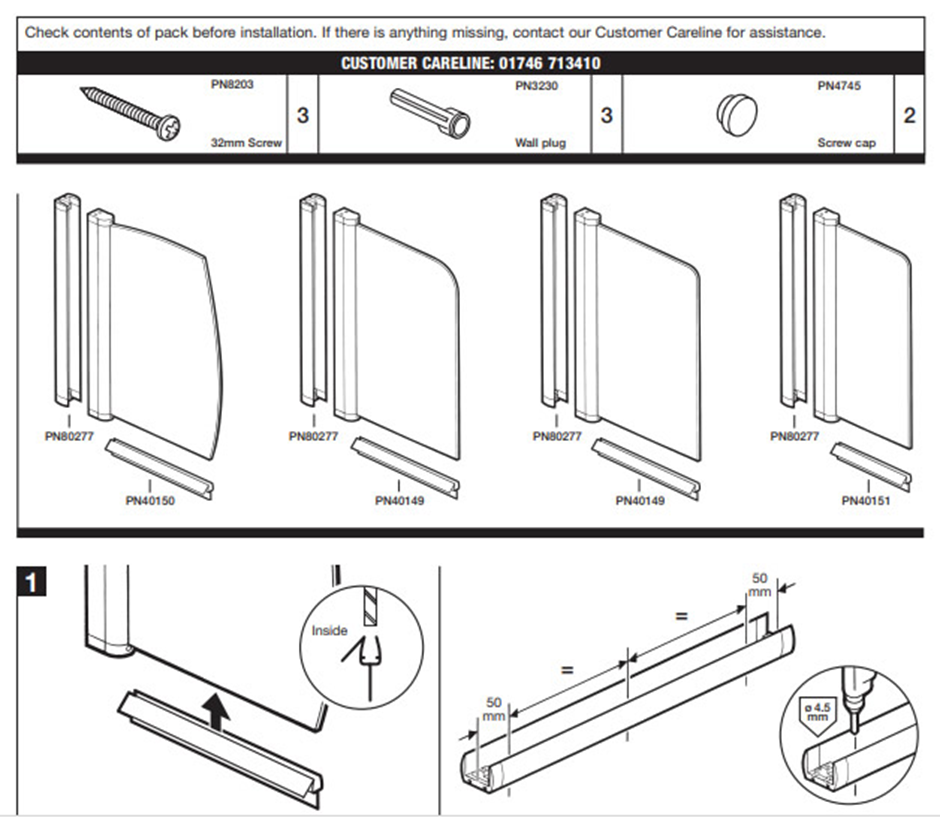
Step 1
Fit the seal to the bottom of the bathscreen ensuring the seal ‘flap’ is on the inside of the screen, trim to length if required.
Drill three holes in the wall channel (PN80277) at points shown using a 4.5mm drill bit, through the grooved centre line.
Step 2
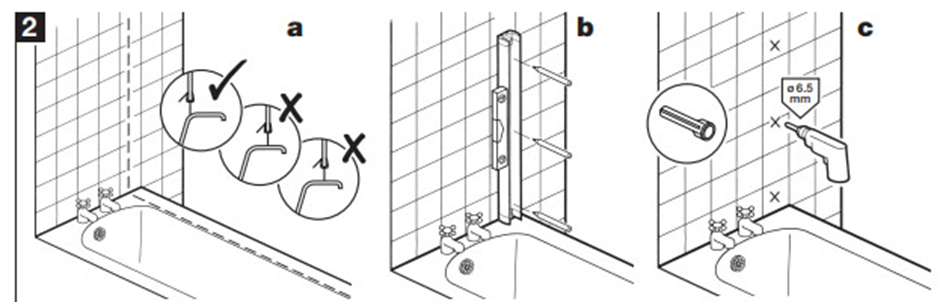
a: Position the bathscreen so that it rests along the inner edge of the bath rim.
b: Position the wall channel, ensure it is perfectly vertical and mark off the drill hole positions against the wall. Place masking
tape against the wall before you mark hole positions. c: Drill 6.5mm holes to a depth of 30mm. Insert wall plugs.
Step 3
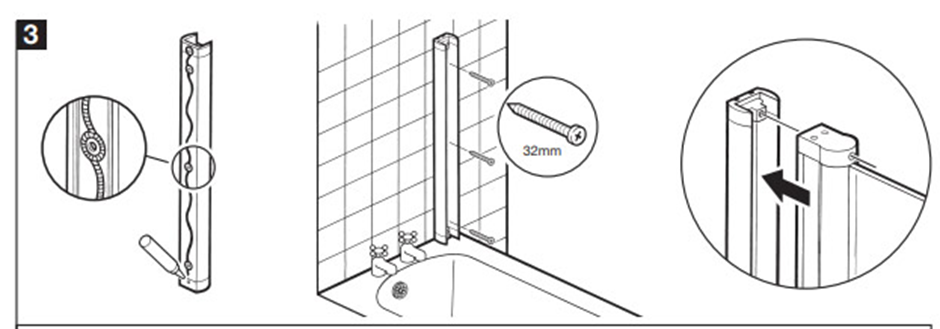
Apply silicone sealant to back of wall channel as shown.
Fix wall channel to wall using the 32mm screws.
Insert the bathscreen into the wall channel, fully tightening the top and bottom screws.
Step 4
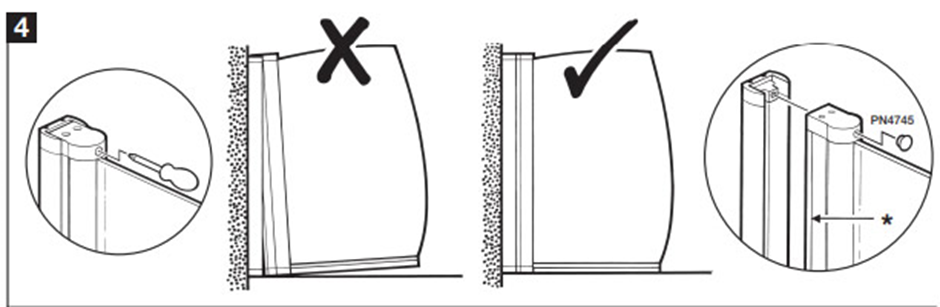
Adjust the bathscreen by tightening or loosening the screws (top and bottom) so that the bottom seal gently brushes the bath rim evenly along its length. IF THE SEAL IS TOO TIGHT ON THE BATH THE BATHSCREEN MAY LEAK.
The bathscreen MUST NOT come out of the wall channel beyond the marked line (*).
Push fit both screw caps in their TOP and BOTTOM positions.
Step 5
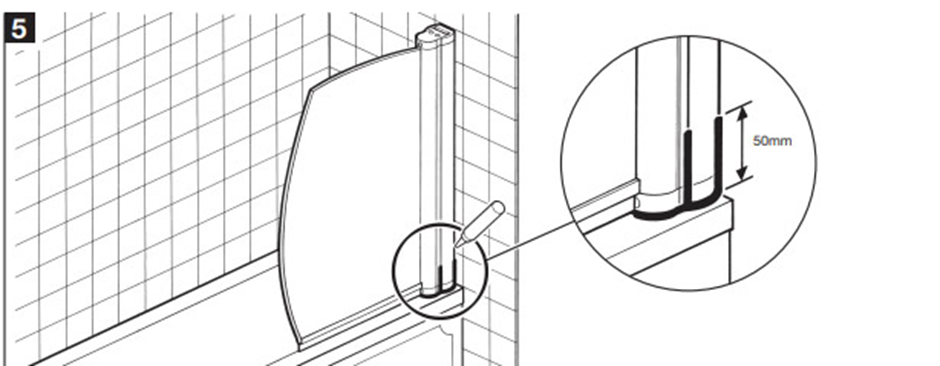
Apply silicone sealant to the outside of the bathscreen where shown. DO NOT apply silicone sealant to the inside face of the bathscreen.