L Shape Rail Installation – Tools Required Before You Start
- Electric Drill with 8mm masonry drill bit
- Suitable Hex Screwdriver
- Masking tape to ensure tiles are not damaged when drilling
- Stainless Steel Pipe cutter or suitable hacksaw
- Spirit level to get rail level
- Tape measure
L Shape Rail Installation Fitting Guide – Step by Step
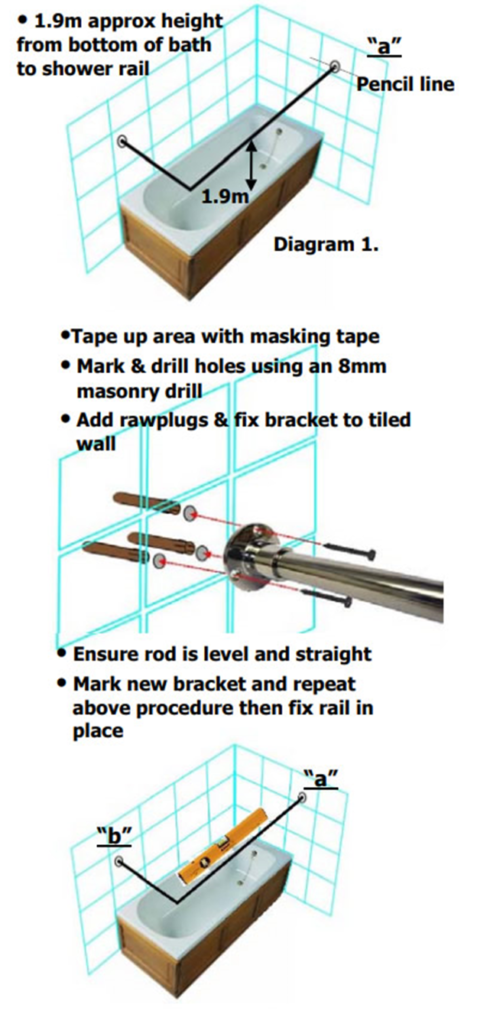
- Measure up from the inside base of the bath approximately 190 cm and
make a horizontal line where you would like bracket “a” to be positioned
(This is so the rail and new curtain fit perfectly as shower curtains are
normally 180cm drop from shower rail) - Decide on the desired length and width of your shower rail and using a pipe
cutter or hacksaw cut the stainless steel rail to size.
( Tip – Rails should be slightly shorter
than the length and width of your bath )
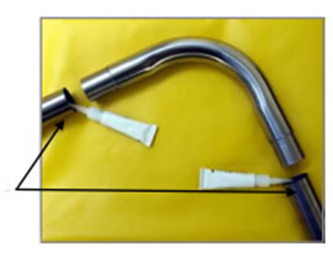
Clean the inside of the tubes and also the elbow piece with a clean cloth. Note – Take Care there may be sharp metal exposed at the ends. Take the metal glue provided and add a moderate amount to the inside of each tube. Push the tube ends over the elbow and leave to set for 10 minutes. Stainless Steel Shower Rail L to Wall – Gluing Rails
- Hold the L shaped rail up against the two walls as per Diagram 1 and mark the
position of the point where the long tube touches the wall on your newly marked
horizontal line with a pencil “a”.
Note. You will need an 8mm masonry drill bit to go through your tiles
- Fix masking tape to the area where you will fix the first bracket and carefully
mark and drill the three holes, then add the rawplugs and fix bracket to wall. - Insert assembled rail into the wall bracket “a” then check that the rail is level
using a spirit level and mark position of the second bracket “b”. - Carefully mask the tile off, drill the holes and add the rawplugs.
- Slide remaining bracket onto the shorter rail and then push the opposite end of
the rail into bracket “a”. Slide second bracket to wall and fix “b”. And tighten up
the retaining grub screws on the brackets. Your rail is now completed.